Categories
Film How to... Photography

How to photograph your own wedding

It’s hard to break a habit of photographing weddings…even at your own wedding, so at our wedding last year (branded as KISTfest), we decided to set up a camera to take a picture every minute in the 2 days prior to the wedding and on the day itself. It’s not every groom that has to think about changing camera batteries, timelapse controller batteries and memory cards (we ended up filling four 4GB cards!) in the build-up to the wedding!

In order to get the best overall feel for the day, we needed the camera to be quite high up, so it was shot from a windowsill, overlooking the main marquee and the space in front; the hub of activity on the day. The windowsill position presented a few challenges with glare from the white frame, rain on the glass and then condensation on the morning of day 2. We also couldn’t go quite as wide as we wanted with the image, as the window frame would have featured. We think it was fairly successful though in capturing the the overall feel of the occasion though and we love freezing individual frames to see some of the great moments captured by the all-seeing eye.

As for camera settings…we didn’t do quite so well. It was one of the first time lapses we’d done and we foolishly decided to go for manual exposure so that you’d get a good feel for the changes in light. On the positive side, this decision gave us some lovely sunrise and sunset transitions of light, fading to and from black. But sadly it also led to some rather over-exposed shots of the marquee roof in bright sunlight and loss of detail at dusk. We’ve learned from that since though in our subsequent time lapses!

Kiri then created a soundscape to accompany the resulting time lapse, using mainly sound bytes from the day of the wedding, but a few off-the-shelf sounds to fill the gaps in the first two days.

Will we now be offering time lapse services as part of our wedding photography offerings? We’ll have to see when we get back from our travels!

Categories
Film Photography

At a crossroads

For several months we’ve been thinking that it would be really cool to climb up to the top of the tower at St. Mark’s Kennington and take some long exposure images of the crossroads at Oval tube station at night. But hey, why stop at just still images? Why not go for a time lapse? So that’s exactly what we did.

Last night, just after 7pm we climbed up the tower and set up a tripod in the roof space, with a camera on top pointing at the crossroads and a timer remote control attached. With the camera all set up (see below if you’re interested in the settings), we set it going, then headed into nearby Kennington Park to have a picnic.

We returned to the camera just before 10pm and this is the footage that it had captured (played back at 12 frames per second):

We’re quite pleased with this, although due to the limitations of where we could fit a tripod in the tower we couldn’t go as widescreen as we would have liked. We particularly like the detail of the London Eye rotating in the background though, which you can just about make out.

Once we’d taken a few long exposure photos from other angles, we came back down to earth, recorded some video footage at the base of the tower (so that we could have sound to accompany the time lapse), then headed off home.

For those who are interested, our time lapse settings were:

  • Fixed ISO of 400 (so the “grain” remained consistent through all images)
  • Manual focus (for consistency between images)
  • Aperture of f/16 (so as to have a largish depth of field)
  • Aperture priority (so the exposures would get progressively longer as it got darker)
  • Image preview off (to conserve battery)
  • Quality of images reduced (to allow 3000 images to fit on a 4GB memory card)
  • Photograph every 3 seconds
Categories
Film Photography

Cultivating creativity, Cornish style

We’ve just returned from a lovely break in Cornwall, where we stayed within a stone’s throw of the sea at a lovely apartment near Coverack. We can really highly recommend the place that we stayed – not only did it have stunning views, but it felt like home from home and was a wonderful place of beauty where we could be creative.

The morning light over the sea was incredible each day (apart from the day it rained) and although we knew we couldn’t capture the scale of the beauty, we had a bash at it one morning. We called the resulting time lapse “Sea Meets Sky” – to be honest we would have loved to have dedicated more time to it, but there are so many exciting things to do and see in that part of Cornwall and we didn’t want to leave the camera all by itself.

However, we did decide to dedicate our day in Marazion to capturing a hungry sea consuming the causeway:

We had a minor creative disagreement as to the composition for the first part of the time lapse (should we focus on the silhouette of St. Michael’s Mount, or people crossing the causeway?), but that doesn’t really matter as after an hour and a half we chose to move to a better location anyway! The tide times really were perfect as it was slowly getting dark just as the sea was lapping over the top of the causeway. We won’t lie – it was absolutely freezing sitting with the camera, but it was also incredibly beautiful.

So was it just a holiday of time lapses? Not really – we did take plenty of photos too – why not check out the album of photos on our Facebook page or the selection of photos in our Flickr account (there are fewer on Flickr!). Whilst you’re there, feel free to follow us or become a fan of our page!

Categories
Film

Moor time lapsed

Dartmoor. A rugged landscape with bracken, ponies and us (briefly) yesterday. We stopped to have a picnic in the car by the side of the road and the view was so incredible that we had to take a photo…but then again the cloud movement looked cool, so we decided on a time lapse.

We set up a tripod with camera on top, manual exposure of a 20th of a second (so that cars would appear as blurs) and set it to take a picture every 30 seconds. Adding a neutral density graduated filter (a bit of glass that sits in front of the lens with a graduation from clear to dark) brought out the detail in the sky. As you can see from the result above, the bubbling clouds are pretty awesome, the ponies moving around are quite cool and we have a few cars occasionally, BUT…it’s very short. We only hung around for half an hour, and once you roll the footage up at 24 frames per second, you get a brief snapshot rather than an epic story. It would be lovely to spend a whole day on Dartmoor at some point to get a richer end product.

This is our third proper time lapse as Lightbulb Head – the first one was at our wedding (we’ll reveal it once we’ve added sound to it) and the second was of melting snow a couple of weeks ago. With each one we’ve learned new things; the main things we’ve noted from this one are the vignetting in the top left corner from the filter holder (schoolboy/schoolgirl error) and to remember that although the camera shoots in a 3:2 aspect ratio, we’ll want the final video in 16:9, which affects the composition. We’ll keep on trying though and we’ll share the results with you as we do.

Categories
Film

Burnt by firewire

WARNING: if you have a camcorder with a firewire connection, even though the standard supports plug and play, turn off your PC and camcorder before connecting them (and disconnecting them) to avoid a power surge (caveat – may not apply to 4-pin to 4-pin cables as they don’t carry power…but then again they may have their own issues with static charges!).

As you may gather from the above statement, issues with a firewire cable (or 3) have made us slightly hot under the collar and have made the circuit board in our camcorder even hotter. Less Kentucky Fried Chicken and more Firewire Fried Camcorder. Here’s our tale of woe…
legria

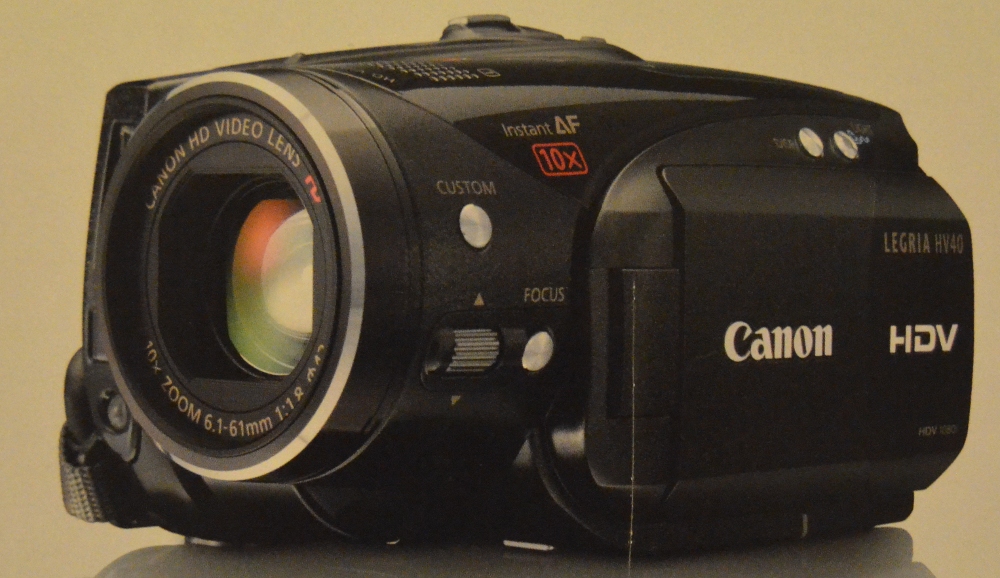
After our previous Canon camcorder was stolen last year, the insurance company provided us with a lovely Canon Legria HV40 HD camcorder – a cracking camera (an assessment which we still stick by). We shot some footage using it, including our wedding video and then decided to try to transfer the contents from the tapes to a computer – firewire being the only real option to transfer it whilst retaining the high definition. Armed with the firewire cable we plugged the camera in…and smelled burning. Not good. The computer wouldn’t recognise the camera. Assessing that it might be a dodgy cable, we went out and bought a Belkin cable, plugged that in and still no joy, then tried it with a friend’s computer – still no joy.

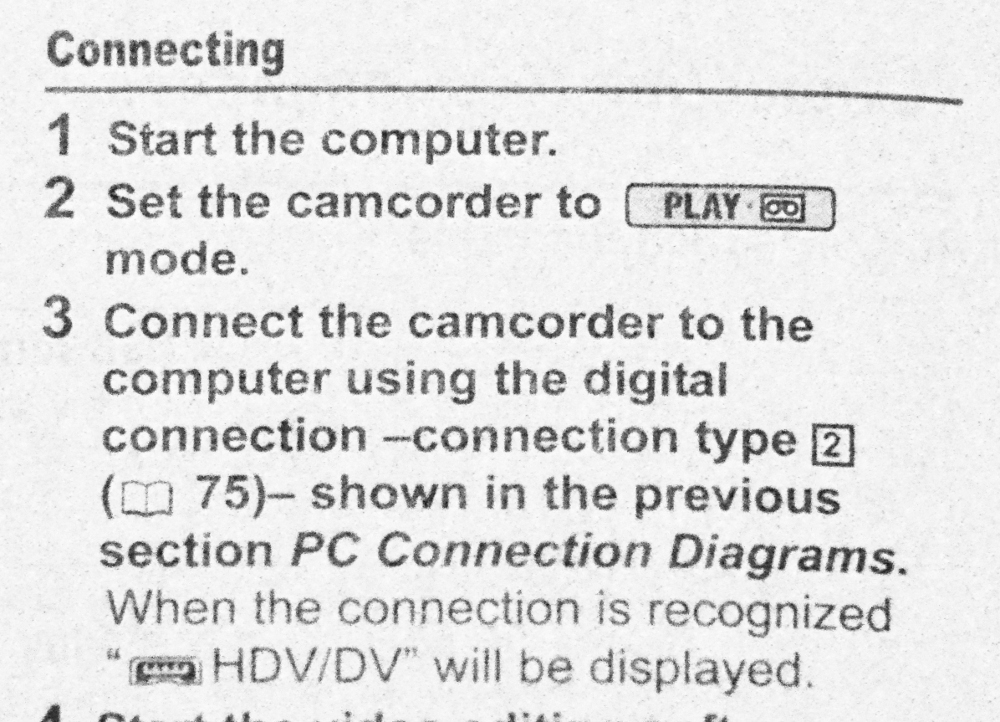
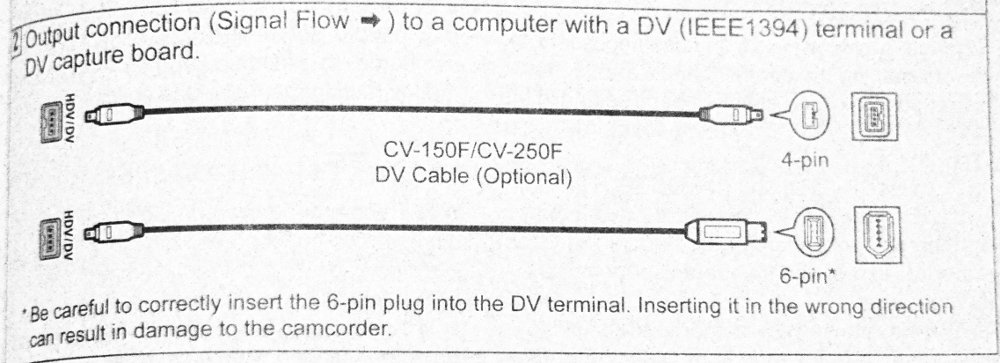
Enter Canon services stage right (well, actually we sent the camcorder to them, but it sounds more dramatic if they enter!). Within a week that had returned the camcorder to us, fixing the issue free of charge (the camera is still within the year’s warranty), with reference to a burned out circuit board, enclosing a sheet of A4 paper talking about dodgy cables. This detailed at length that some cables have a shorter 4-pin section than others, which can lead to short-circuiting in the camera depending on how it is plugged in. There was also a small section saying that to be on the safe side, both computer and camera should be switched off when plugging in a firewire cable…seems strange in this day and age with plug and play devices, but hey ho. Nothing about that in the manual; in fact that’s a direct contradiction to their instructions in the manual where it says to start the computer before connecting the camera:
startthecomputer

To give them credit, there is warning to say that if you insert the DV connector the wrong way round, it could damage the camera, but inserting it the wrong way looks very difficult to do!
wrongdirection

So, we tried the Belkin cable again and were very happy to begin to transfer our wedding video. Just over an hour into the video, the connection began to stutter, so we tried unplugging the camera and plugging it back in, but to no avail. Dodgy cable? We thought Belkin were quite a good brand. Out we trotted to purchase a new cable (well, we didn’t actually trot), but that didn’t work either. So…back to Canon with the camera. This time it was less good news.

It turns out that ours is not an isolated case of Firewire Fried Camcorder – just perform a search for those three words online and you’ll read many horror stories, and not just for Canon (although it appears that the Canon HV20, Canon HV30 and Canon HV40 are particularly bad). However Canon have assured us that it is user error that caused the fried circuit board – they only repaired it for free the first time “as a goodwill gesture” and are unwilling to take any responsibility for our damaged camera, quoting over £200 to replace the circuit board. And that’s a generous quote for parts + VAT only and no charge for labour. However, they did acknowledge that they were aware of the vulnerability with firewire and kindly promised to pass on my suggestion to the manufacturing part of the business to maybe include surge protection in future models.

So where do we go from here? If we get it fixed (and we see no other option), we will be pedantic in ensuring that both computer and camera are turned off before connecting a brand new firewire cable (our fourth!), but apparently even having the battery in the camera can cause a potential difference, which could fry another circuit board. The whole problem might even be the computer sending a charge down the cable, so there’s no guarantee the new circuit board will be safe. Canon acknowledged that there is no 100% safe method for connecting a firewire cable to the camera. Seems like this gauntlet is a necessary one to run though if you shoot with tape, as miniDV tape decks are only made for the professional market and USB cannot stream at a high enough throughput for HD.

In summary, this saga has made us very wary about firewire; we had no idea this technology could be so dangerous and costly. The clue’s possibly in the name though…now has anyone been burnt by fireFOX…?